【Three.js】blenderで作成した3Dモデルを表示する方法(GLTFLoader)
久々にThree.jsを触ってみたら書き方が大きく変わっていて苦労したので覚え書き。
まずはThree.js Fundamentalsの「基礎知識」から、3Dのキューブを表示させるコード。
<!DOCTYPE html>

<head>
    <meta charset="UTF-8">
    <meta name="viewport" content="width=device-width, initial-scale=1.0, user-scalable=yes">
    <title>Three.js</title>
</head>

<body>
    <canvas id="c"></canvas>
</body>

<script type="module">
    import * as THREE from './three.module.js';

    function main() {
      const canvas = document.querySelector('#c');
      const renderer = new THREE.WebGLRenderer({canvas});

      const fov = 75;
      const aspect = 2;
      const near = 0.1;
      const far = 5;
      const camera = new THREE.PerspectiveCamera(fov, aspect, near, far);
      camera.position.set(0, 0, 3);

      const scene = new THREE.Scene();

      const color = 0xFFFFFF;
      const intensity = 1;
      const light = new THREE.DirectionalLight(color, intensity);
      light.position.set(-1, 2, 4);
      scene.add(light);

      const boxWidth = 1;
      const boxHeight = 1;
      const boxDepth = 1;
      const geometry = new THREE.BoxGeometry(boxWidth, boxHeight, boxDepth);

      const material = new THREE.MeshBasicMaterial({color: 0x44aa88});

      const cube = new THREE.Mesh(geometry, material);
      scene.add(cube);

      renderer.render(scene, camera);
    }

main();
</script>
</html>
これをThree.jsでキューブを作成するのではなく、blenderで作成したbox.glbファイルを読み込ませるようにしたコードが以下。
<!DOCTYPE html>

<head>
    <meta charset="UTF-8">
    <meta name="viewport" content="width=device-width, initial-scale=1.0, user-scalable=yes">
    <title>Three.js</title>
</head>
<body>
    <canvas id="c"></canvas>
</body>

<script type="module">
    import * as THREE from './three.module.js';
    import { GLTFLoader } from './GLTFLoader.js'; //GLTFLoaderの中身も書き換える

    function main() {
      const canvas = document.querySelector('#c');
      const renderer = new THREE.WebGLRenderer({canvas});

      const fov = 75;
      const aspect = 2;
      const near = 0.1;
      const far = 5;
      const camera = new THREE.PerspectiveCamera(fov, aspect, near, far);
      camera.position.set(0, 0, 5);

      const scene = new THREE.Scene();

      const gltfLoader = new GLTFLoader();
      const url = './box.glb'; // glbファイルへのパス
      gltfLoader.load(url, (gltf) => {
        const root = gltf.scene;
        scene.add(root);
      });

      const color = 0xFFFFFF;
      const intensity = 1;
      const light = new THREE.DirectionalLight(color, intensity);
      light.position.set(-1, 2, 4);
      scene.add(light);

      function render() {
        renderer.render(scene, camera);
        requestAnimationFrame(render);
      }

      render();
    }

main();
</script>
</html>
ディレクトリの構成は以下のようにindex.htmlと同じディレクトリにthree.module.js、GLTFLoader.js、box.glbを配置する。

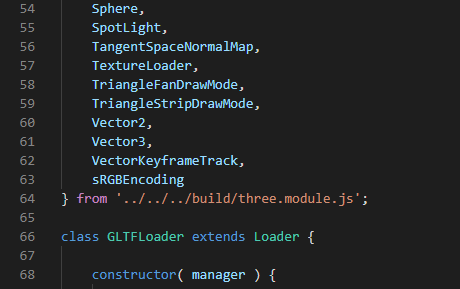
GLTFLoader.jsは内部にthree.module.jsへのパスがあるので、そこを書き換える必要がある。
GLTFLoader.jsを開き、64行目の「’../../../build/three.module.js’」を同じ階層に配置した場合は「’./three.module.js’」に変更する。
20~25行目でカメラの配置や描画範囲を設定している。
モデルの位置や大きさによって描画されない・一部しか映らない場合は、ここの数字を変更する。
const fov = 75;
const aspect = 2;
const near = 0.1;
const far = 5;
const camera = new THREE.PerspectiveCamera(fov, aspect, near, far);
camera.position.set(0, 0, 3);
以上がGLTFLoaderでglbファイルを読み込む方法。
ただし上記のコードだと読み込んだキューブの正面しか見えないためわかりにくい。
そこでOrbitControlsも合わせたコードが以下。
<!DOCTYPE html>

<head>
    <meta charset="UTF-8">
    <meta name="viewport" content="width=device-width, initial-scale=1.0, user-scalable=yes">
    <title>Three.js</title>
</head>
<body>
    <canvas id="c"></canvas>
</body>

<script type="module">
    import * as THREE from './three.module.js';
    import { OrbitControls } from './OrbitControls.js';  //OrbitControlの中身も書き換える
    import { GLTFLoader } from './GLTFLoader.js'; //GLTFLoaderの中身も書き換える

    function main() {
      const canvas = document.querySelector('#c');
      const renderer = new THREE.WebGLRenderer({canvas});

      const fov = 75;
      const aspect = 2;
      const near = 0.1;
      const far = 5;
      const camera = new THREE.PerspectiveCamera(fov, aspect, near, far);
      camera.position.set(0, 0, 3);

      const controls = new OrbitControls(camera, canvas);
      controls.update();

      const scene = new THREE.Scene();

      const gltfLoader = new GLTFLoader();
      const url = './box.glb'; // glbファイルへのパス
      gltfLoader.load(url, (gltf) => {
        const root = gltf.scene;
        scene.add(root);
      });

      const color = 0xFFFFFF;
      const intensity = 1;
      const light = new THREE.DirectionalLight(color, intensity);
      light.position.set(-1, 2, 4);
      scene.add(light);

      function render() {
        renderer.render(scene, camera);
        requestAnimationFrame(render);
      }

      render();

      controls.addEventListener('change', render);
    }

main();
</script>
</html>